PCT gear review: the small stuff
Here you go: part 2 of my PCT gear review. I’ll cover the gear I used on my 2014 PCT thru-hike beyond the Big Three I reviewed in my last post.
Feel free to jump to the topic of your choice:
- food preparation
- water treatment
- Sierra gear
- trekking poles
- survival & tools
- electronics
- medical kit & personal items
- ziplocs
Food preparation
I went no-cook (i.e. didn’t carry a stove) from Campo to Agua Dulce, and was pretty happy with it. I used a small peanut butter jar to rehydrate soup mixes, and a Light My Fire Spork to stir and eat. It doesn’t really matter what kind of jar you use, as long as it has a tight seal; it is nice, though, to be able to fit your hand inside it for cleaning. I would use something like the Talenti Gelato jars next time — any gear choice that starts with eating ice-cream is a good call in my book.
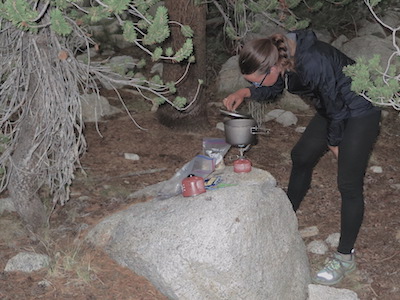
At Agua Dulce, I picked up my MSR MicroRocket canister stove and 0.85L MSR Titan Kettle, and carried both the rest of the way to Canada. I had always planned to have the stove when I entered the Sierra, so that I’d have a way to make hot water to treat hypothermia. I found while doing no-cook, that if I was alone when I ate, I had no problems with it. If I was around other people cooking at night, I missed hot food real bad; I found myself eyeballing Lizard & Boomerang’s Mac & Cheese SO HARD. I also developed a strong hankering for hot chocolate, so stove it was.
I should add that adding a stove increased my weight not only due to the weight of the stove and fuel, but because the food I cooked was almost always fewer calories/ounce than bean soup with fritos.
The MicroRocket worked great for me. I was always able to find gas canisters when I needed them; they don’t have to be MSR, but they do have to have the right type of attachment — if in doubt, always check. I didn’t realize how much left-over fuel I had been putting in the hiker box until Washington, when I used the same 4 oz canister from Cascade Locks all the way to Stehekin — over 350 miles. At the time I was cooking dinner every night (Mac & Cheese, rice side, etc.), making 12 oz of hot chocolate, and sometimes cooking a ramen lunch, so it wasn’t like I was barely using the thing.
I also had no issues with getting the stove lit, even in cold temperatures. It heats less quickly and uses more fuel than a Jetboil-style stove, and the fuel cans are heavier than carrying HEET for an alcohol stove. I liked using it despite those traits, as it packs down small (fits inside the Titan Kettle), and it passed the SoCal fire ban requirement of having an off switch.
The Titan Kettle (titanium pot) was also great. I used my hat and buff (in hat configuration) as pot cozies every night, and only spilled food on them once a section or so. It held all my food just fine, though the larger meals got pretty close to the top.
I drank my hot chocolate out of the Titan Kettle until I picked up a light plastic beer mug at the Bend Brewfast; I carried that for the rest of the hike so that I could make my hot chocolate before rehydrating food in the pot.
The Light My Fire spork broke somewhere in the early Sierra. First it cracked, then it snapped below the bowl of the spork. I made do with the stubby spork for several days until I got to Bishop, where I picked up a Vargo Titanium Eagle Spork. The “eagle” bit means it has a tiny carabiner-clip at one end, so you don’t lose it, I guess? I never used the clip, unless you count getting it accidentally clipped to the mesh of my pack. The titanium spork was much more solid than the plastic one — didn’t break, didn’t heat up, could scrape the bottom of the pot better. It was worth the ~$10 to not worry about another utensil busting on me in the backcountry.
The Verdict: I am interested to try out an alcohol stove one of these days, as I saw many hikers using them safely (and a few setting small smoldering fires that they put out…), but until that point, I’m happy with my little MSR MicroRocket stove with the 0.85L MSR Titan Kettle. I might carry the plastic beer mug again, but would skip it if I was trying to lighten up. I would use another titanium fork, like the plain, clip-less Vargo Titanium Spork.
Water treatment
After using the Sawyer Squeeze on the JMT, I decided to try chemicals on the PCT. I used a halogen to treat my drinking water all but a handful of times on the trail, and would do it again. I started out using Aquamira drops, which use chlorine dioxide to kill waterborne pathogens; according to the CDC’s guide to backcountry water treatment, chlorine dioxide is great against bacteria, viruses, and giardia, and weak against cryptosporidium. I found the drops a bit annoying — you have to mix two parts, wait 5 minutes, add it to your water, then wait another 15-30 minutes before drinking. I think the recommendation is for even longer if the water is colder.
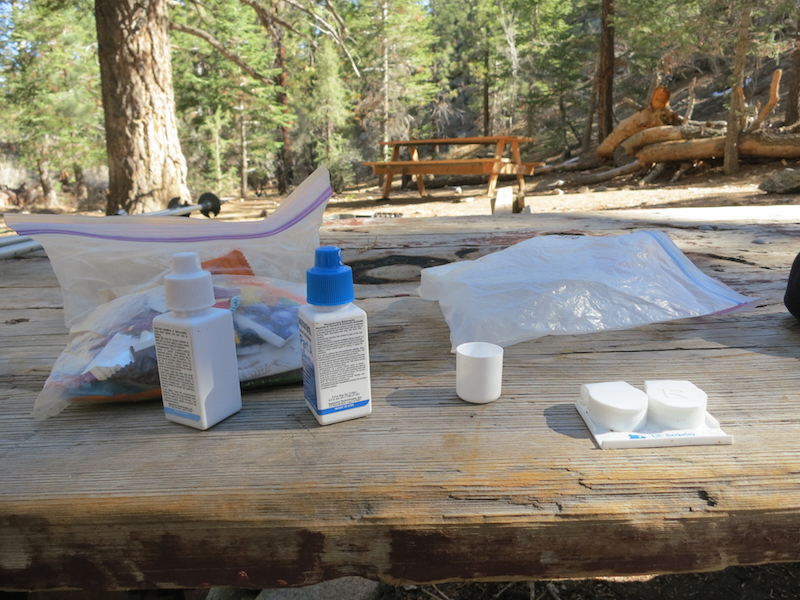
I carried an old contact case (pictured above) for mixing two doses of Aquamira simultaneously. I read this online somewhere, don’t remember where. I loved this method, and kept using it even after one lens case started cracking.
I used my bandana to filter big chunks in Southern California, and found that it worked way faster with a larger bottle opening; I started carrying at least one Gatorade bottle to accommodate this.
My first set of Aquamira drops lasted me all the way to Bishop, about 800 miles in. At that point, I switched to using bleach (chlorine). One small (10 mL) bottle lasted me until Ashland, and the next bottle lasted from Bend to Canada.
A note on types of bleach: look on the bottles when you buy, and avoid getting a gel-type bleach. I did this by accident in Ashland, and spent the next several hundred miles wondering if the gel was mixing into my water effectively. Maybe it was? I just didn’t know. It didn’t instantly disperse in the bottle the way regular liquid bleach does, and I decided to not take the chance. I found regular bleach in Bend and dumped the gel.
Bleach is a easier to use than Aquamira — add a drop to a liter of water and wait 30 minutes. The CDC lists it as having high effectiveness against bacteria and virus, but weak against giardia and not effective for cryptosporidium, so it’s chancier than Aquamira. I started by adding 3 drops to a liter, thought that tasted like a swimming pool, then did 2 drops for a day or so, then dropped to a single drop. If a water source looked really sketchy, I’d do two.
The biggest downside to chemical treatment to me was the wait time. If the water was really cold, I would wait an hour for treatment, which meant that I would carry extra water so that I wasn’t refilling only when I was totally out. It was hard at times to watch friends drinking from their Sawyer Squeezes immediately, and I did use my friend’s Steri-pen a few times in Oregon.
I didn’t mind the taste of 1 drop of bleach in 1L of water. Some water out there tastes bad anyway — hello, cow water.
I never got sick from the water on the trail; I would have counted this as three or more bouts of diarrhea in a row. This doesn’t mean my treatment was effective — I might have just not encountered giardia or crypto, or I may have some immunity to giardia.
About two weeks before the end of the trail, I started joking about being in the “giardia-free zone”, which meant that if I contracted giardia from that point forward, I wouldn’t get the symptoms until *after* I had finished the hike. I started being a little less careful about treating my water, though that meant I occasionally drank untreated water from springs where I could see the water coming straight out of the mountain.
Though this must have tempted the gods, I didn’t get any symptoms after the trail either.
I know quite a few thru-hikers who did get giardia or some other persistant nasty GI issue, including one for whom it ended his hike. Even more so than most gear choices, water treatment choice is a very personal one, and one that can have debilitating trail-ending consequences. I saw lots of hikers happy with their Sawyer Squeezes and Steri-pens.
The Verdict: I’ll continue using household bleach in a mini dropper bottle to treat my water in the backcountry, with an occasional bandana to filter out the big chunks.
Sierra gear
Ice/snow traction
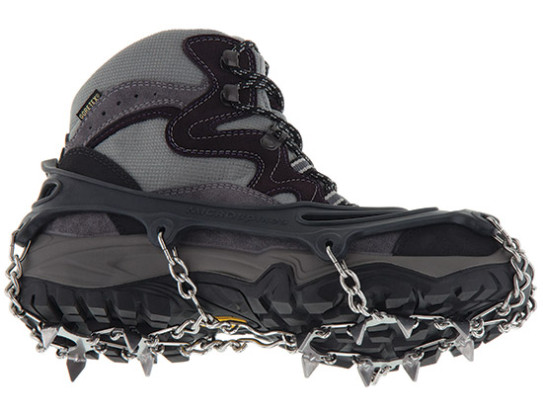
I carried Kahtoola Microspikes through the High Sierra, from Kennedy Meadows to South Lake Tahoe, for added traction in icy conditions. They slip over your shoes and provide more traction than the coil-based Yaktrax, for example, but less than full mountaineering crampons. They were extremely helpful when I was descending Mather Pass — the trail was snowed over, and it was fastest and safest-feeling to walk down across an icy snowfield as far as I could, rather than rock-hop the entire way. Combined with my trekking poles, the microspikes kept my feet on the ground, and the rest of me in one place.
When the microspikes weren’t useful was, 1) when I wasn’t using them, and 2) when the snow was too soft to grip.
I took them off before I slipped on Glen Pass, as they didn’t seem to be helping my travel. Looking back, I think using them and being more patient could have led to a safer descent on that pass. As for soft snow, so much of safe crossing the Sierra passes is timing — early enough that the snow is hard and you don’t post-hole, but not so early that the snow is still icy and slippery. At that right time, microspikes can be very useful. The tricky thing is that it takes time to cross the snowy patches, so the spikes might not be that great for the off-peak hours when you still have to be crossing snow (i.e. when it’s still slick, or when it has started to soften up).
I chose not to bring an ice-ax on the hike, largely because I didn’t know how to use one. If I do another big hike with snowy regions, I will be doing some snow safety training ahead of time, and will bring an ice-ax if I think the terrain and conditions warrant it.
I know hikers who entered the Sierra a few weeks after me, and had virtually zero snow on the passes. I, on the other hand, entered two weeks before the standard “safe entry” date (June 15th), so should have given more thought to what that meant for snow conditions.
A Portland hiker named Leapfrog told me how he uses trekking poles to self-arrest during glissading, and I used his technique with success on Forester Pass. If I were to not bring an ice-ax next time, I would make sure I knew how to use my trekking poles, and like with an ice-ax, carry them in ready position if I should need to self-arrest.
The Verdict: I would carry the Kahtoola Microspikes again, and consider an ice-ax (with training).
Eye protection
The last bit of snow-specific gear I carried in the Sierra was good(ish) sunglasses. I carried a pair of tinted but not polarized glasses for the first part of the hike, and had found that wearing them in low light made it almost impossible to see. I kid you not — wearing those glasses at dusk turned my field of vision into a dark impenetrable haze. I also sat on them at some point, and had taped them together to make it to the next town.
When I got to Bishop, I browsed the gear stores’ selection of sunglasses, and spent a bit more (still only ~$30) on a pair of wrap-around polarized sunglasses. The difference between those and the tinted glasses, in terms of seeing in the bright snow and bright light, was like night and day. With the polarized glasses, I never had to choose between glare and being able to see, and in the brilliant light of the High Sierra, that was a very good think.
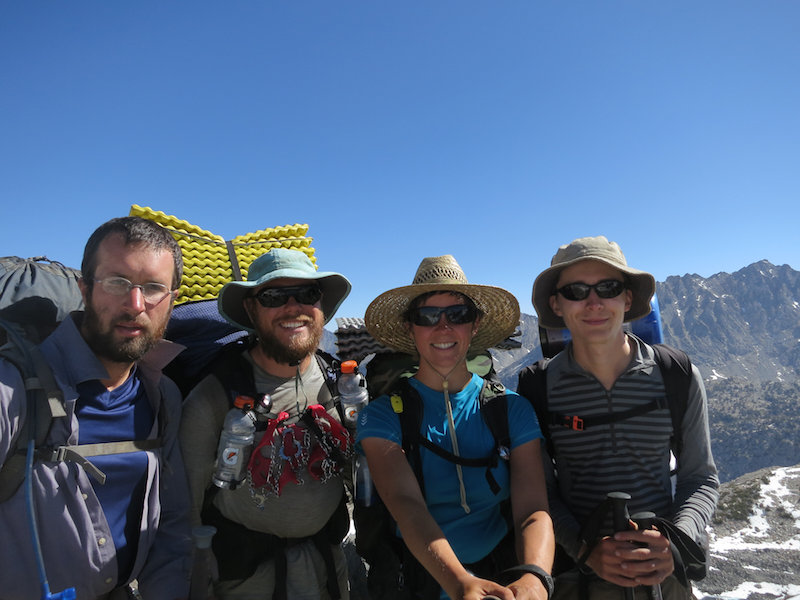
Atop Glen Pass, wearing the wrap-around polarized sunglasses, with Big Boots, Jordi, and Sock Pot.Jordi is showing off his Kahtoola Microspikes on his sternum strap.
I should throw in here, that I have light eyes — grey or blue depending on who you ask — and they are just plain bad in bright light. I’ve always had issues with glare, and growing up in eyeglasses as a kid in the PNW, never really learned to wear sunglasses. The greater utility of the polarized glasses felt like such a revelation. So, if you have blue eyes and have trouble with glare, it’s not you, it’s your iris’ lack of melanin. Treat yourself to some polarized glasses and see easier.
If you happen to be wearing glasses and don’t have prescription sunglasses, just stack those suckers. Function over fashion on the PCT, every time.
The Verdict: I would definitely get polarized sunglasses for at least the snowy sections, and probably the entire trail.
Bear Canister
A friend lent me her bear canister, the same one I’d used on the JMT: the Garcia Backpackers’ Cache Model 812. I think it may be the heaviest bear can out there, so there’s that.
On the plus side, it’s an excellent chair. It also fits easily into my Circuit pack. I could pack all my food into it during the sections where that was mandated, and was happy to send it home after exiting the required zones.
The Verdict: I liked the Garcia Backpackers’ Cache Model 812 bear canister well enough, but would consider splurging on a carbon fiber Wild Ideas Bearikade in the future.
Trekking poles
I started the PCT without trekking poles. To be honest, I had a bit of an anti-trekking-pole feeling going into the thru-hike. They seemed like crutches, and I didn’t want to use a crutch. I’d hiked the whole JMT without them, and if I didn’t need them for the hardest part of the trail, why would I need them for the rest?
All this rhetoric flew out the window when I hurt my feet coming into Idyllwild. I was staying with a friend who gently pointed out that I couldn’t bear weight on either foot — one due to burgeoning blisters, and the other due to tendonitis. With this wake-up call, I decided that I would try whatever it took to keep going, including using hiker-crutches.
Joke’s on me, ’cause it turned out that I *loved* my trekking poles.
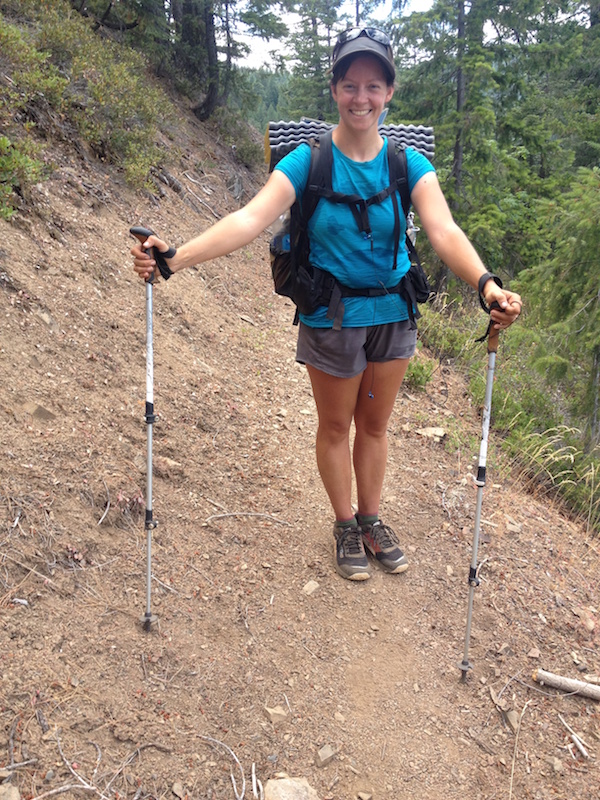
The outfitter in Idyllwild carried a small selection of poles, but luckily had some really excellent ones: Leki Lhasa Lite Trekking Poles (women specific). These have flip locks, rather than twist, and cork handles a bit smaller than those on the mens version, which fit my hands well.
Walking with trekking poles helped with my tendonitis hugely. They took some of the stress off my feet, and gave me something to lean on at breaks and while going downhill. I don’t know the science of how much load they shift, but I know my foot healed after I started using them, and that was wonderful.
I liked thinking of it as going from being bipedal to being a quadruped.
The Lhasa Lites lasted me all the way from Idyllwild to Canada, and are still going strong now. The only damage I can see is where desert rodents chewed most of the way through both handle straps. After that incident, I started keeping them inside my bivy sack, and then later inside my tent; I also tried to remember to rinse the tasty sweat out of them in town.
Once I switched to the SMD Skyscape Trekker for my shelter, the Lekis did double duty as tent poles. As the best length for me while walking was 110 cms, but 115 cm when supporting the tent, I learned to set the bottom adjustment at 115 and the top at 105. This made it so that I only ever had to adjust the top, while still having the optimal length at all times.
It took me some time to learn my way around the trekking poles; I read up a bit on the most efficient way to walk with them (plant pole with opposite foot). A thru-hike gives you lots of time to practice, and the motion became second nature within a section or two. I did have some incidents when I would try to scratch my leg with the trekking poles and instead, tripped myself. So, try to avoid that.
In general, though, the trekking poles provided so much extra stability on rocky terrain, while crossing streams and snow fields, and while going down hill. I’ve never had big issues with my knees, but even I was starting to have knee pain during the big downhills in Washington; I think the trekking poles saved me from worse pain.
An added bonus was the endless supply of pole-related humor, you’re a mature adult like myself. Jordi and I spent an entire morning, while post-holing in the Sierra, entertaining ourselves by trading pole jokes — “the handle of my pole is slippery today”, “my pole keeps shortening when I don’t want it to”, you get the picture…
The Verdict: I loved using trekking poles on the PCT, and would buy the Leki Lhasa Lite trekking poles again in a heart beat. Unfortunately, it looks like they have been discontinued (why?!), so I would go with another Leki model, perhaps the cork-handled Cressida or the cheaper, soft-rubber handled Jannu.
Survival & tools
Knife
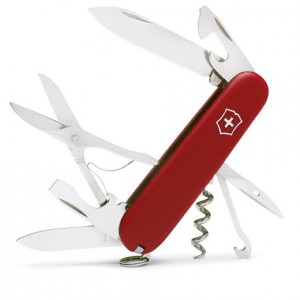
I carried my Victorinox Swiss Army Climber pocket knife most of the trail, and was happy with it. At 3 oz, it’s heavier than many lightweight pocket knives, and has tools that I never used, but I already owned it before the trip, and free is a good price.
Of all the tools on this knife, I used the scissors and longer blade the most. The scissors were so incredibly useful — I won’t go on another trip without them. I cut not only packaging in town, but did most of my medical work with them — trimming dead skin, cutting bandages to size, etc. I also made gear repairs with them, and lent them out to scissor-less hikers. The ~2″ blade I used mostly for cutting food and spreading cream cheese on tortillas.
Beyond those two blades, I used the bottle opener and corkscrew in towns, and the toothpick and tweezers occasionally.
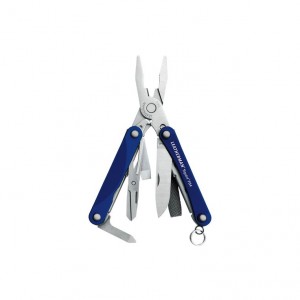
When it became clear that my tent zipper issue wouldn’t have an easy resolution, I picked up a new knife that included pliers: the 2 oz Leatherman Squirt PS4. The pliers did their job on the zipper, but I missed the slightly longer blade of the Swiss Army knife.
The Verdict: I have a sentimental attachment to my Swiss Army Climber pocket knife and thought it worked great on the PCT. If I needed pliers, I would use the Leatherman Squirt PS4 again. I might get a straight-up knife next time, instead of a multi-tool, particularly if I thought I’d be using the knife for cutting more than cheese.
Navigation
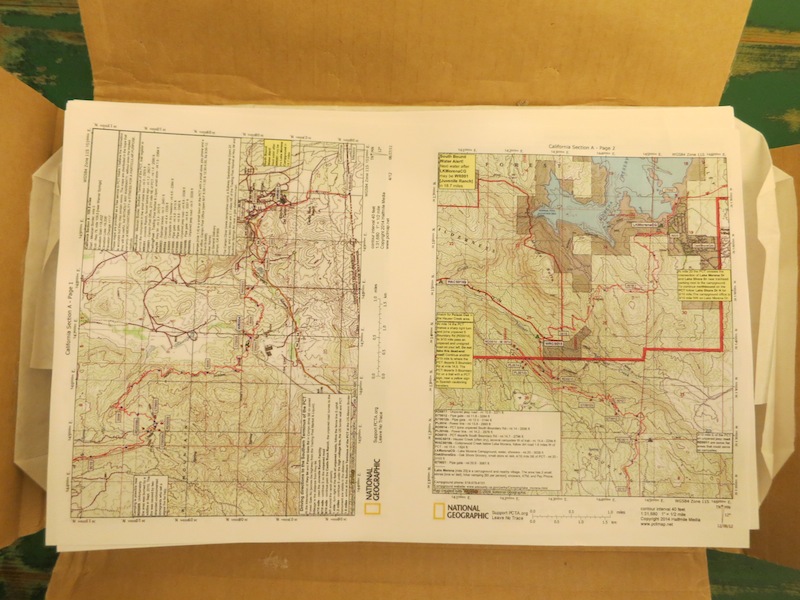
The PCT is an extremely well marked trail, so I mostly used signage to navigate. I always carried paper Halfmile maps, though, and was glad I did. I got fairly small ones, and next time I might splurge on larger ones (single map to 8.5″x11″) for more visible details.
I carried my Silva Polaris baseplate compass, which I never used. Like insurance, I don’t think tools have to be used to earn a place in my pack, so I’ll keep carrying a lightweight compass on all backcountry trips.
The Verdict: I will continue carrying paper maps, perhaps slightly larger ones. Halfmile’s are the way to go on the PCT. I will also continue carrying my Silva Polaris compass.
Light
My headlamp for this trip was the Petzl Zipka Plus 2, a discontinued model I got back in 2012. I loved so much about it: the retractable cord, its 2.5 oz weight, the red light setting for less jarring night light. I also hated some features: the weak light (max 70 lumens), and the way the lamp slid around on my forehead.
I used the headlamp to set up camp many nights after the summer solstice, when I was hiking later into twilight. I only night-hiked with it a few times, and found it unhelpful. If I had it off, the light of the moon illuminated everything around me, except the tread of the trail. If I had it on, I could see the trail enough to not trip, but nothing outside the trail. I think this is a larger issue to headlamp night-hiking than to just my headlamp, but still. I would want something a lot stronger to do nighthiking in the future.
The Verdict: I would not use the Petzl Zipka Plus 2 for a thru-hike again. I will look around for a light option that puts out more light, and look into better methods for night-hiking illumination.
Repair & Fire
I brought a tiny ziploc of stormproof matches & tinder in case my lighter ever got soaked or wouldn’t work. I never had to use them, but at 0.5 oz, would carry them again.
I also carried a small amount of tenacious tape, and nylon tent patches, which I used for patching my wind pants. I used the tenacious tape to repair a hole i made in my tent with the zipper.
The Verdict: I’ll keep carrying a small amount of stormproof matches & tinder, and tenacious tape & nylon tent patches.
Electronics
I carried quite a few electronics during my thru-hike, and I’m happy about that. I liked having ways to be connected to my partner at home, and to keep the loneliness at bay.
I met other hikers, almost always section or day hikers, who would make statements like “I’m just not out here to be using gadgets, I prefer to be immersed in nature”. When they saw my headphones, some would make comments about “wanting to hear the sounds of nature”, and to them I thought, “That’s nice. I felt that too. For the first 1000 miles of the hike.”
Phone
When I started, my iPhone 4S was tucked away inside my pack. I had some idea that I would only use it for emergencies, or for contacting Russell from towns. Part of this was practicality — the battery would only last so long, and I didn’t want to use it up on frivolous uses, then be SOL in a crisis.
Walking through the ugly civilization of the SoCal part of the trail (giant windmills, walking through towns, lots of roads and train tracks), I made the decision to think of the hike not as a wilderness experience, but as walking across the US. Once I made that mental adjustment, using my phone seemed totally fine, and I realized that there was cell service EVERYWHERE. The abundant service only lasted through SoCal, but I took advantage of it to stay connected with Russell and be a touch less lonely. And Facebook in the wilderness, occasionally.
I used the phone for: navigation apps (Guthook, Halfmile, Google maps), texting, making phone calls, reading (Kindle app, Overdrive library app), listening (podcasts, music, audio books), taking pictures, and blogging (WordPress app).
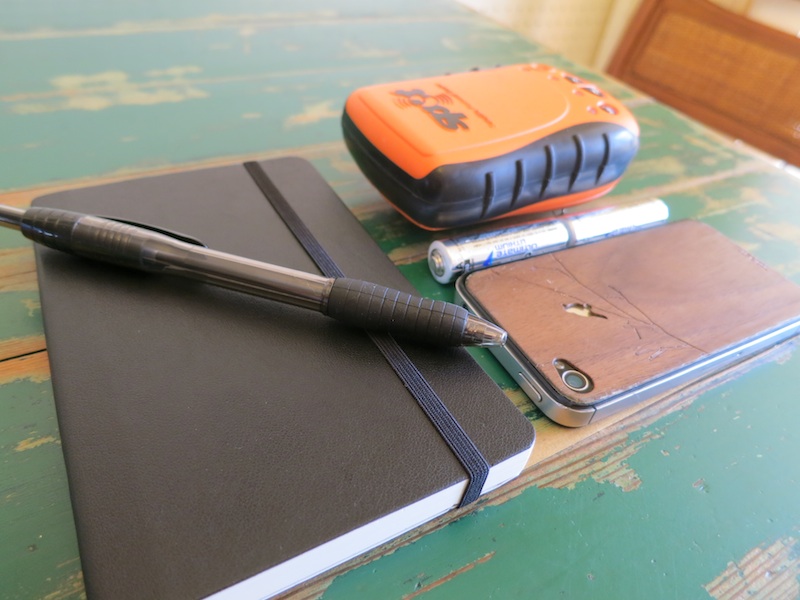
The phone itself was fine. The battery life is not good, so I would sleep with it in my quilt/sleeping bag to keep it warm. It was a gift from a friend who was upgrading, and it came to me cracked, with a pretty wood backplate (she put a bird on it!). I didn’t get a case for it, and managed to never damage it on the trail. I did manage to get rain in the phone during a 3 mile hike in the Columbia River Gorge last month and now the camera doesn’t work, so I would definitely get a case next time.
The Verdict: I would definitely bring a cell phone on another thru-hike. The iPhone was fine, though one with a better battery life would be better.
Camera
In addition to the phone, I carried a compact point & shoot camera: the Canon Powershot S100. On day 2 the shutter started sticking (probably from desert dust), and by two weeks in, I was having to manually open the shutter, and tap it shut. I tried a few hacks, following instructions online to reset various features, and use air to clean the shutter, but it would go back to sticking within a few days. At Mammoth Lakes, I sent the camera home with Russell for him to mail off for repair.
Canon repaired the under-warranty camera fully (at no charge, with little hassle, I might add), and I picked it up at Cascade Locks. In between Mammoth Lakes and Cascade Locks, I took pictures with my iPhone, but far fewer, which I’m a bit bummed about. I did enjoy the freedom of not feeling like I should take a pic, but in general, I missed having the real camera. I didn’t miss the weight, though.
While the iPhone camera felt like it wasn’t as good as the Canon S100, I am not a great photographer, and I’ve seen people take better pics with their phones than I could with my camera. I do wish I had realized that the front camera on the iPhone is far lower quality (no more than 72 pixels/inch) than the regular back camera.
I didn’t like using the USB card reader — it was too slow. Instead, I would upload my pictures onto Russell’s computer when he came to visit. Barring that, I would have sent home memory cards. Two batteries was sufficient.
The Verdict: If you like taking pictures and know how to use your camera, carry it! You’ll be glad you did. Send it home if you get tired of it; skip it if you’re fine with phone pics. I’ll keep bringing my Canon Powershot S100 (this model is now outdated), and keep learning how to use it.
E-reader
I carried a Kindle Paperwhite from Agua Dulce to Bartle Gap, and found it very good for keeping my sanity at night. I started out with only a few books on my iPhone, but found that reading drained the battery enough to make the phone die before I got to the next town. Russell had offered me the Kindle before I left, since Kindles have much better battery life — one charge can last 2-3 weeks of reading every day — and once I realized I wanted to be reading nightly, I requested it in my next box.
I used a piece of cardboard cut to the size of the Kindle as a cover, with a rubber band holding it on. This was lightweight and worked well to protect the device. I got in a routine of reading before sleep every single night, and appreciated being able to connect to a wifi network so I could download new books in town.
Once I got my solar panel and no longer had to worry about battery charge on the phone, I sent the Kindle home. I didn’t miss the weight, but I did miss the superior screen for reading.
The Verdict: Carry a solar panel, get reading apps on your phone, and skip the weight of an e-reader (and charger cord).
Personal Locator Device
I carried a borrowed 1st generation SPOT Personal Tracker device. After initial misgivings about feeling too connected to the outside world, I quickly came to love the little beast. I got into a habit of sending an “I’m okay” message every night when I made camp, and as far as I know, most or all of them got through. I never used the Help or Emergency buttons.
One of my favorite parts of carrying the SPOT was knowing that someone knew where I was, particularly my husband. I ran the SPOT in tracker mode the whole time, which let people see location updates every 10 minutes or so. When I was feeling low, or hadn’t seen anyone all day, I could think of him (and my parents and friends and family) watching the little dots pop up on their map, and caring.
My Uncle John used my SPOT track to come surprise me on trail outside of Agua Dulce, which was one of my favorite moments of the hike. Russell used the track to find me at the earlier Tehachapi road crossing for our first town rendezvous.
For responsible SPOT track or OK message you, the hiker must train their followers to not freak out if a message doesn’t go through or the tracking drops out. I was glad to hear after the hike that my mother had watched my track disappear at a river crossing, but kept her cool until it reappeared several hours later.
The most critical purpose of the SPOT was in case of a medical emergency. It would have been the only way to get timely assistance in much of the High Sierra and remote parts of Washington.
The Verdict: I will carry a SPOT or similar locator device on future backpacking trips, at the least so they can find my body… Halfmile and Jordi were carrying DeLorme devices that looked intriguing, so I’ll do some research before getting my own device.
Solar Power
I decided to get a solar panel and Spotify subscription so I could listen to music, when I was suffering from the NorCal blues. OH MY GOD, I’m so glad I did.
Once I got my setup, I could put on a dance album and power up a hill with one headphone in. It was amazing. What I listened to evolved over the rest of the hike, but I never stopped having something to keep me going through the hard climbs.
I copied my solar setup from Loveline, who let me charge my phone off his battery at Carson Pass (thanks a bunch!). I used a Suntactics sCharger-5 USB Solar Charger strapped to the top of my pack, hooked up to an Anker Astro Mini 3000mAh External Battery. During the day the battery would charge, and at night I would hook it up my phone. This avoided the on/off trills that iPhones make when they charge, and the battery drain that can occur when the charge goes off (so I hear).
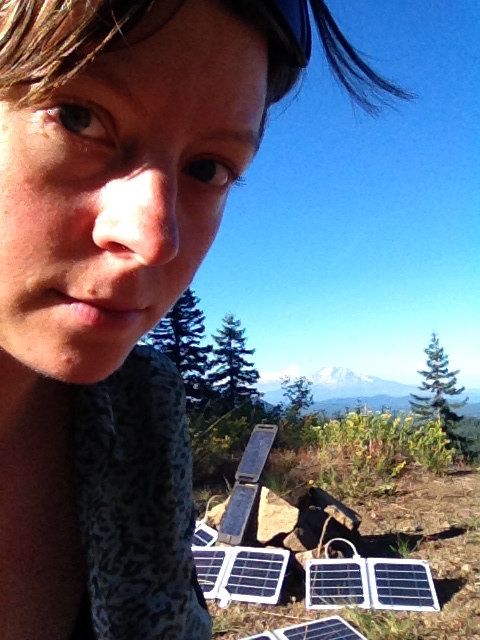
A Penguin, Mt. Adams, some other solar charger, and 4 Suntactics sCharger-5s charging happily in the Washington sun.
I read before the hike that solar panels are “useless in Oregon and Washington”. For the record, I only had 2-3 days in Oregon and Washington when I couldn’t get the battery charged up enough to charge my phone fully at night. Repeat: for only 2-3 days was this solar charger not pulling its weight. The only thing I did differently in the rainy states was to put my phone to charge directly during sunny breaks. I didn’t have a lot of rainy or overcast days though, so YMMV with the weather lottery you draw.
The Verdict: I would definitely start with the Suntactics sCharger-5 solar panel and Anker Astro Mini External Battery, and carry them the whole way next time.
Headphones
I carried a pair of inexpensive earbud headphones that I bought at an Office Max in South Lake Tahoe. They worked fine, until they didn’t. Somewhere early in Washington, my iPhone started spontaneously entering Voice Control Mode, and I couldn’t get it to turn off. I googled the issue during a town stop, and the internets blamed broken headphones. I picked up a new pair at the gas station in Skykomish, and carried them the rest of the way.
The Verdict: I would carry earbud headphones with an inline controller next time, so I could pause or skip music without digging my phone out of my hipbelt pouch.
Journalling
I carried a small Moleskine Classic Notebook for the entire hike; well, two notebooks, sequentially. I wrote in it almost every night, and added feathers that I found along the way. I loved having something physical to write in; the ritual grounded me nightly. The only downside to this notebook was its weight (~4 oz).
I carried two pens the whole trip: one in my med kit and one with my journal. No particular pens, just whatever I found when one ran out.
The Verdict: I might try electronic journalling on a short trip to see if I prefer that method of recording data and feelings. If I don’t dig the e-journal, I’ll carry the Moleskine Classic Notebook again.
Medical & personal
Coming right off a Wilderness First Responder course, I carried a beefy med kit on the PCT. I actually used most of the items in it, though, so for me it was weight well spent.
Med Kit — carried and used
Here is what I carried and how I used it: ibuprofen (pain relief from headaches, infected blisters, tendonitis, menstrual cramps, and general aches & pains), ace bandage (wrapped foot with tendonitis to provide support), paper medical tape (attached clean bandages to cover open blisters), 2×2″ and 4×4″ gauze bandages (covered open blisters), leukotape (covered unopened blisters), needle & thread (lance & thread blisters), lighter (cleaned needle prior to use), scissors on pocket knife (cut off dead skin), Bactrim (antibiotic course for infected blisters), moleskin (reduced friction on blisters), Vicodin (relieved tooth ache on trail), aloe gel (relieved pain from sunburn), sunscreen (prevented sunburn)
Med Kit — carried and didn’t use
I carried (at one point or another) but didn’t use: gauze bandage roll, giardia meds (metronidazole), traveler’s diarrhea meds (cipro), aspirin, tylenol, sugar, extra course of Bactrim, Zantac (prevent ulcers, combat heavy use of ibuprofen), Vagisil (reduce chafing), tegaderm dressing, steristrips, blank paper SOAP note, pen.
I did a pack shakedown at Tahoe, since I was sending my bear canister home at that point, and sent home a fair amount of unused excess med kit items, including the extra Bactrim, the unused Vagisil, the Zantac, and an extra gauze bandage.
The Verdict: I would carry everything in the first category again, plus aspirin, sugar, tegaderm, steristrips, the SOAP note, and pen. I wouldn’t carry the diarrhea meds next time, but rather treat any illnesses as they arose.
Eye care
I got a prescription for Air Optix Night & Day contacts before the trail, which I could wear for up to 30 days in a row. I didn’t go the full 30, but did keep them in continuously between resupply spots, rewetting my eyes in the morning with eye drops, or sometimes just blinking a lot. I carried the 3 oz travel size ClearCare solution and case for cleaning.
I had an incident on one of my first backpacking trips, when I dropped a contact in the dirt, rinsed it with water, put it back it, and promptly got a raging eye infection that left a scar on the back of my eye for several years. Since then, I haven’t effed around with eye care in the backcountry, so when my eyes got irritated on the trail, I switched to glasses until my eyes felt better.
I protected the glasses with a small light case that I neglected to return to my friend’s dad after a backpacking trip several years ago (uh, thanks Pat!). I fashioned a lanyard out of cord from the hiker box to keep the glasses on after they loosened up in the hot hot heat of SoCal.
The Verdict: Maybe I’ll get serious about Lasik? Until then, I’ll keep wearing Air Optix Night & Day or other long-wearing contacts and carrying backup glasses.
Personal hygiene
I carried the following for oral and personal hygiene: toothpaste, travel toothbrush, floss, small mirror, retainer & case, Dr. Bronners liquid soap, toilet paper, a Diva cup, tampons, 2 reusable panty liners from Gladrags, hand sanitizer, Alba chapstick.
I used the tooth cleaning tools daily, and the small mirror to check for bits of food left in my teeth. I basically never used the Dr. Bronners unless something went horribly wrong while wiping (it happens), and then only over a cathole. I used the Diva cup for the first three periods, and switched to tampons for the last three (yup, no skipping periods here). I used the cloth panty liners until I stopped caring about staining wearing underwear.
The hand sanitizer lived in the mesh at the back of my pouch, and I used it after each cathole expedition. The chapstick lived in a belt pouch and I barely used it after the Sierra.
The Verdict: I’d carry all the same again, except the panty liners.
Ziplocs
Last, but not least, ALL THE ZIPLOCS.
My PCT hike was facilitated largely by Ziploc bags. When I think about hikers doing long treks in byegone eras, I don’t think about the weight of the gear or the lack of electronics, I wonder how the hell they managed without Ziplocs.
Gallon, quart, snack size — I used them all. Freezer bags were great for pouring hot water directly into for rehydrating food, but storage bags were fine for repackaging other food. Russell would ship me a handful of quart bags and a few gallon bags in each resupply box, and I almost always used them all.
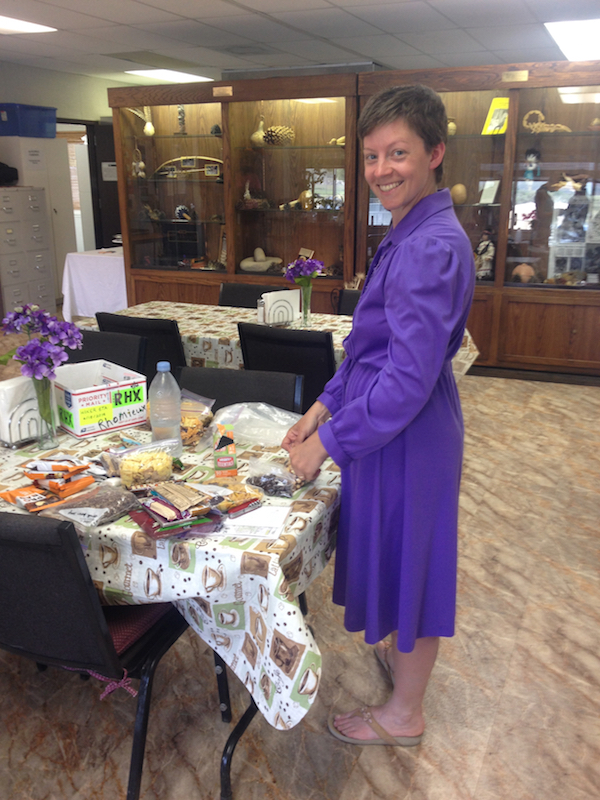
Repackaging food into ziploc bags during my first resupply stop at the Warner Springs Community Center.
Everything, and I mean everything, lived in a ziploc bag. I carried my journal in a ziploc, my TP, my used TP & tampons, even put my wet shoes in a giant one a few times in the Sierra so they didn’t muck up the inside of my tent and didn’t freeze outside.
I carried my food in a 12×20″ OPSAK odor-proof bag from LokSak. I switched it out every month or so. I liked being able to see through to my food, and found the plastic durable. I’m not sure if odor-proof really applied to the bag, since I wasn’t 100% careful with not getting food smells on the outside.
The Verdict: Ziploc bags will save your sanity on the trail. Get some in your resupply boxes or buy some in town. Don’t skimp on quality — you don’t want gatorade powder mucking up your damp pack. OPSAKs are great for food storage.
—-
What did I miss? Ask your questions in the comments.
Check out my PCT gear review: the Big Three.
Read my PCT clothing review.


thanks for your awesome, thorough, and surprisingly entertaining gear reviews! i’ve enjoyed them — lots of good info.
I’m an inexperienced hiker, and your gear reviews are very helpful, thanks I was just thinking that Zip-Locs would be very necessary for a hike so I was glad to read that you thought so too, ha!
This is one of the best reviews that I have read. GREAT job and THANK YOU!
Hi Alice! Thanks for posting this. I have a question about your SPOT device – how long did the batteries last since you used the tracking mode all the time? I’m considering doing this for the JMT this year, but probably won’t if I have to carry a bunch of extra batteries.
Hi Erin! The lithium batteries for my 1st gen SPOT lasted 3-4 weeks per set. My friend Alyssa used one set on her entire 23 day JMT hike, using the 2nd gen version, the SPOT II (and wrote about it here http://bettermoveonfrog.com/why-i-returned-the-spot-connect/). Have an amazing JMT hike.
2-3 weeks is awesome! Thanks for the info, Alice. I loved following your PCT hike although I rarely ever commented (sorry about that!). Thank you for sharing your journey and knowledge with us.
So enjoy reading your blog and am loving the gear reviews. Thanks for sharing.
VERY much enjoyed your comments Have re-read them several times. My husband and I are attempting (no, DOING) our first thru-hike in 2016 and I’m obsessing over details. You mentioned sugar in the med Kit. What is sugar used for? Thanks again for all the info!
The sugar in the med kit is for emergency treatment of hypoglycemia or hypothermia. I carried hot chocolate packets for this purpose too, but in my food bag, and I ate them as I went… Disclaimer: I am not a doctor or medical professional; this is not medical advice.
High five for doing a thru-hike next year — have an amazing time!
How are you adjusting to the different off trail diet? I’m surprised more LD hikers don’t have eating disorders after their LD hikes.
Hey, my User Pic looks like the Mucinex commercial glob.
How did we keep our things from getting wet and storing gear during the bygone eras? We didn’t have any electronics to worry about. We didn’t have electronics to navigate with we used full size topo maps with compass and sometimes laminated the maps. We used stuff sacks not water proof just plane old stuff sacks. Then we would cover our entire pack with a big garbage bag if it rained. We also used garbage bags for rain gear. Just cut out holes for your arms. Worked great!
Hey there! 😀 Thanks for keeping this blog up — we’re still reading it!
“I liked thinking of it as going from being bipedal to being a quadruped.” ~ That’s exactly how I think about trekking poles, too! I tell people that they turn you into a four-legged animal. The Lord has saved me from some pretty nasty falls with those things, heh heh.
Happy hiking!